In modern software development, writing robust, maintainable, and error-free code is paramount. TypeScript has emerged as a powerful tool in this endeavor, layering a strong static type system on top of JavaScript to catch errors at compile time. However, type safety is only one piece of the puzzle. A comprehensive testing strategy is the other critical component that ensures your application behaves as expected. When combined, TypeScript and a solid testing framework create a formidable duo for building high-quality software.
This article serves as a comprehensive guide to TypeScript Testing. We will dive deep into setting up a testing environment, writing effective unit tests for various scenarios, and exploring advanced patterns and best practices. Whether you’re working on a TypeScript Node.js backend, a complex TypeScript React frontend, or any other TypeScript project, mastering these testing techniques will significantly elevate your code quality and development confidence. We’ll use practical examples with popular libraries like Jest and Vitest to demonstrate how to test everything from simple functions to complex asynchronous API calls and DOM interactions.
Setting Up Your TypeScript Testing Environment
Before you can write tests, you need a solid foundation. This involves choosing a test runner and configuring it to work seamlessly with your TypeScript codebase. The right setup ensures a fast and efficient feedback loop, which is crucial for a productive development workflow.
Choosing a Test Runner: Jest vs. Vitest
Two of the most popular test runners in the JavaScript and TypeScript ecosystem are Jest and Vitest.
- Jest: Created by Facebook, Jest has long been the de-facto standard for testing JavaScript applications. It’s an all-in-one framework that includes a test runner, assertion library, and mocking capabilities. Its maturity means it has extensive documentation and a large community, making it a reliable choice for any project, including those using TypeScript Angular or TypeScript Vue.
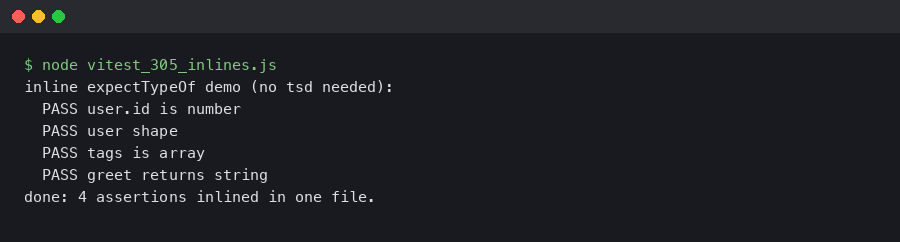
- Vitest: A newer contender that has gained immense popularity, especially within the Vite ecosystem. Vitest is designed to be fast, leveraging Vite’s native ESM support for near-instant test runs. It boasts a Jest-compatible API, making the migration from Jest to Vitest relatively straightforward.
For this guide, our examples will primarily use Jest’s API syntax, which is also compatible with Vitest, making the concepts transferable.
Initial Configuration with Jest
To get started with Jest in a TypeScript project, you need a few development dependencies. `ts-jest` is a crucial transformer that allows Jest to understand and execute TypeScript code.
npm install --save-dev jest ts-jest @types/jestNext, you’ll need a configuration file, typically `jest.config.js`, at the root of your project. This file tells Jest how to handle your files.
/** @type {import('ts-jest').JestConfigWithTsJest} */
module.exports = {
  preset: 'ts-jest',
  testEnvironment: 'node',
  roots: ['<rootDir>/src'],
  testMatch: [
    '**/__tests__/**/*.+(ts|tsx|js)',
    '**/?(*.)+(spec|test).+(ts|tsx|js)',
  ],
  transform: {
    '^.+\\.(ts|tsx)$': ['ts-jest', {
      tsconfig: 'tsconfig.json',
    }],
  },
};
This configuration sets `ts-jest` as the preset, specifies the test environment (e.g., `node` for backend or `jsdom` for frontend), and defines patterns for discovering test files. Ensuring your TSConfig file is correctly referenced is key for the TypeScript Compiler to process your code correctly during tests.
Testing Core TypeScript and JavaScript Concepts
With the environment set up, we can start writing tests. The foundation of any testing suite is the unit test, which verifies the functionality of the smallest, most isolated parts of your application—typically individual functions or methods.
Testing Synchronous Functions and TypeScript Types
Let’s start with a simple synchronous function. This is the most straightforward type of test and is a great way to get comfortable with the testing syntax. Consider a utility function that processes a user object.

TypeScript code on screen – Code
src/utils/formatter.ts
// Using TypeScript Interfaces for strong type definitions
export interface User {
  id: number;
  firstName: string;
  lastName: string;
  isAdmin: boolean;
}

export function formatUserLabel(user: User): string {
  if (!user) {
    return 'Invalid User';
  }
  const adminTag = user.isAdmin ? ' (Admin)' : '';
  return `${user.lastName}, ${user.firstName}${adminTag}`;
}
Now, let’s write a TypeScript Unit Test for this function. We’ll create a file named `formatter.test.ts` in the same directory or a dedicated `__tests__` folder.
src/utils/formatter.test.ts
import { formatUserLabel, User } from './formatter';

// 'describe' groups related tests together
describe('formatUserLabel', () => {

  // 'it' or 'test' defines an individual test case
  it('should format a standard user label correctly', () => {
    const user: User = {
      id: 1,
      firstName: 'John',
      lastName: 'Doe',
      isAdmin: false,
    };
    // 'expect' is the assertion
    expect(formatUserLabel(user)).toBe('Doe, John');
  });

  it('should add an (Admin) tag for admin users', () => {
    const user: User = {
      id: 2,
      firstName: 'Jane',
      lastName: 'Smith',
      isAdmin: true,
    };
    expect(formatUserLabel(user)).toBe('Smith, Jane (Admin)');
  });

  it('should handle null or undefined input gracefully', () => {
    // TypeScript helps prevent this, but defensive code should be tested
    expect(formatUserLabel(null as any)).toBe('Invalid User');
  });
});
Notice how we import the `User` interface to create typed mock data. This is a key benefit of TypeScript Testing—your tests are as type-safe as your application code.
Handling Asynchronous Code: Promises and Async/Await
Real-world applications are rarely purely synchronous. Testing Async TypeScript code, like functions that return a `Promise`, requires a slightly different approach. Jest and Vitest provide excellent support for this.
Imagine a function that fetches data from an API, inspired by a price oracle that retrieves cryptocurrency prices.
src/services/priceFetcher.ts
import axios from 'axios';

const API_URL = 'https://api.coingecko.com/api/v3/simple/price';

export interface PriceData {
  [key: string]: {
    usd: number;
  };
}

export async function fetchCryptoPrice(coinId: string): Promise<number> {
  try {
    const response = await axios.get<PriceData>(API_URL, {
      params: {
        ids: coinId,
        vs_currencies: 'usd',
      },
    });

    if (response.data && response.data[coinId]) {
      return response.data[coinId].usd;
    }
    throw new Error('Price data not found in response');
  } catch (error) {
    console.error('Failed to fetch crypto price:', error);
    throw new Error('API request failed');
  }
}
To test this without making a real network request (which would be slow and unreliable), we must mock the `axios` library.
src/services/priceFetcher.test.ts
import axios from 'axios';
import { fetchCryptoPrice } from './priceFetcher';

// Mock the entire axios module
jest.mock('axios');

// Use jest.Mocked to get a typed mock object
const mockedAxios = axios as jest.Mocked<typeof axios>;

describe('fetchCryptoPrice', () => {

  it('should return the price of a cryptocurrency successfully', async () => {
    const mockData = { ethereum: { usd: 2000.50 } };

    // Configure the mock to return a successful response
    mockedAxios.get.mockResolvedValue({ data: mockData });

    // Use async/await in the test
    const price = await fetchCryptoPrice('ethereum');

    // Assert the result
    expect(price).toBe(2000.50);
    expect(mockedAxios.get).toHaveBeenCalledTimes(1);
    expect(mockedAxios.get).toHaveBeenCalledWith(
      'https://api.coingecko.com/api/v3/simple/price',
      { params: { ids: 'ethereum', vs_currencies: 'usd' } }
    );
  });

  it('should throw an error if the API call fails', async () => {
    // Configure the mock to return a rejected promise
    mockedAxios.get.mockRejectedValue(new Error('Network error'));

    // Use .rejects to assert that the promise was rejected
    await expect(fetchCryptoPrice('bitcoin')).rejects.toThrow('API request failed');
  });
});
Here, `jest.mock(‘axios’)` replaces the actual `axios` module with a mock. We then use `mockResolvedValue` and `mockRejectedValue` to control the outcome of the `axios.get` call. The `async` keyword on the test function and `await` on the function call are essential for handling the Promises TypeScript correctly. The `.rejects` matcher is a clean and declarative way to test error paths.
Advanced Testing Patterns and DOM Interaction
Beyond individual functions, you’ll often need to test how different parts of your system interact, especially in frontend applications built with frameworks like TypeScript React, Angular, or Vue.
Testing TypeScript in the Browser with Testing Library
When testing components that render to the DOM, it’s a best practice to test from the user’s perspective. The Testing Library family of tools is designed for exactly this. It encourages you to write tests that find elements the way a user would (by text, label, role, etc.) rather than by implementation details like CSS classes or component state.
First, install the necessary packages for a React project:
TypeScript code on screen – C plus plus code in an coloured editor square strongly foreshortened
npm install --save-dev @testing-library/react @testing-library/jest-domYou’ll also want to configure Jest to use the `jsdom` environment and set up `@testing-library/jest-dom` for additional DOM-specific matchers.
Let’s test a simple `Counter` component written in TypeScript React.
src/components/Counter.tsx
import React, { useState } from 'react';

export const Counter: React.FC = () => {
  const [count, setCount] = useState(0);

  return (
    <div>
      <h2>Counter</h2>
      <p>Current count: <span data-testid="count">{count}</span></p>
      <button onClick={() => setCount(count + 1)}>Increment</button>
      <button onClick={() => setCount(count - 1)}>Decrement</button>
    </div>
  );
};
The test will render this component, simulate user clicks, and assert that the DOM updates correctly.
src/components/Counter.test.tsx
import React from 'react';
import { render, screen, fireEvent } from '@testing-library/react';
import '@testing-library/jest-dom';
import { Counter } from './Counter';

describe('Counter Component', () => {
  it('should render with an initial count of 0', () => {
    render(<Counter />);

    // Find elements by their text content or role
    expect(screen.getByText('Current count:')).toBeInTheDocument();
    expect(screen.getByTestId('count')).toHaveTextContent('0');
  });

  it('should increment the count when the increment button is clicked', () => {
    render(<Counter />);

    // Find the button by its accessible name (text content)
    const incrementButton = screen.getByRole('button', { name: /increment/i });

    // Simulate a user click
    fireEvent.click(incrementButton);

    // Assert that the count has updated in the DOM
    expect(screen.getByTestId('count')).toHaveTextContent('1');
  });

  it('should decrement the count when the decrement button is clicked', () => {
    render(<Counter />);

    const decrementButton = screen.getByRole('button', { name: /decrement/i });

    fireEvent.click(decrementButton);

    expect(screen.getByTestId('count')).toHaveTextContent('-1');
  });
});
This approach ensures your tests are resilient to refactoring. As long as the user experience remains the same, the test will pass, even if you change the underlying implementation.
Best Practices and Tooling for Robust TypeScript Testing
Writing tests is one thing; writing *good* tests is another. Following best practices and leveraging the right tooling will make your test suite a valuable asset rather than a maintenance burden.
Writing Clean and Maintainable Tests
TypeScript code on screen – a computer screen with a bunch of lines on it
- Arrange, Act, Assert (AAA): Structure your tests clearly. First, arrange the setup (create mock data, render components). Then, act by executing the function or simulating a user event. Finally, assert that the outcome is what you expected.
- One Assertion Per Test: Ideally, each test case should verify a single behavior. This makes it easier to pinpoint the cause of a failure.
- Descriptive Naming: Use clear, descriptive names for your `describe` and `it` blocks. A good test name should describe the expected behavior, e.g., `it(‘should return an empty array if no users are found’)`.
- Avoid Logic in Tests: Keep your tests simple and free of conditional logic like `if/else` or loops. Tests should be predictable and straightforward.
Integrating with Your Development Workflow
Testing shouldn’t be an afterthought. Integrate it into your daily workflow. Use your test runner’s “watch mode” (`jest –watch` or `vitest`) to automatically re-run tests whenever you save a file. This provides instant feedback and helps you catch regressions immediately.
Furthermore, ensure your tooling is consistent across your codebase. Configure TypeScript ESLint and TypeScript Prettier to enforce code style and catch potential issues in your test files, just as you do for your application code. A well-configured TypeScript Development environment is essential for productivity.
Code Coverage and CI/CD
Code coverage tools measure what percentage of your code is executed by your tests. You can generate a report with Jest by running `jest –coverage`. While aiming for 100% coverage can be counterproductive, coverage reports are invaluable for identifying critical, untested parts of your application. The goal is not just to hit a number but to ensure your most important logic is thoroughly tested.
Finally, automate your tests by integrating them into a Continuous Integration/Continuous Deployment (CI/CD) pipeline (e.g., using GitHub Actions, GitLab CI, or Jenkins). This ensures that no code that breaks existing tests can be merged into your main branch, safeguarding the stability of your project.
Conclusion
TypeScript Testing is not just about preventing bugs; it’s about building confidence in your codebase, enabling fearless refactoring, and creating a living documentation of how your application is supposed to work. The combination of TypeScript’s static type system and a comprehensive test suite provides multiple layers of defense against errors, leading to more robust and maintainable software.
Throughout this guide, we’ve journeyed from setting up a testing environment with Jest to writing effective unit tests for synchronous functions, asynchronous operations, and DOM interactions. We’ve seen how mocking is essential for isolating code and how frameworks like Testing Library help us write user-centric frontend tests. By adopting these patterns and best practices, you can harness the full power of the TypeScript ecosystem to deliver high-quality applications. The next step is to apply these principles to your own TypeScript Projects and make testing an integral part of your development culture.